Most producers think the mix is where you fix the song. It isn’t. The mix is where the song reveals itself – and the choices you make during production decide whether mixdown is a quick polish or a salvage operation.
This is the central idea I taught at our recent Liveschool Input mini-conference in Sydney – a talk called Mixing Starts at Production. I’m a Liveschool trainer and the founder of SUB-human Engineering, a mixing and mastering practice working with artists across electronic music, including What So Not.
What follows is the written version of that talk, with the full video below.
Two rules to keep in mind before we get into it.
Rule #1: It depends. It’s the best answer to almost any musical question. It’ll come up a few times below.
Rule #2: LUFS are for cowards. I’ll explain that one in the loudness section. Partly a joke. Mostly a joke.
Pick Your Ingredients: Sound Design as Preventative Medicine
Most mixing problems are design problems. The fix isn’t a smarter EQ move at mixdown – it’s a better choice at the moment you select or design the sound in the first place. Think of this as preventative medicine for your music. Go to the gym. Eat your vegetables early. Don’t wait until something hurts to do anything about it.
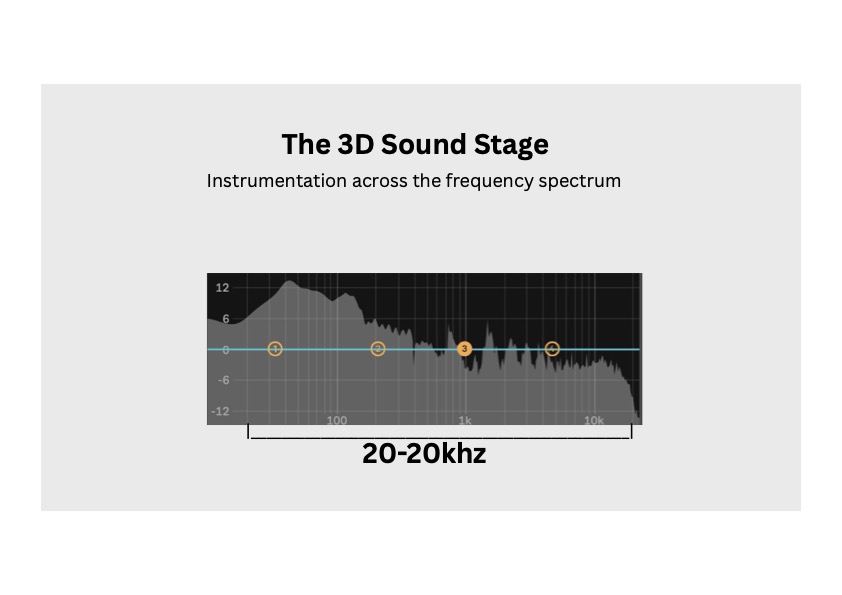
The frequency spectrum from 20 Hz to 20 kHz is your palette. Every sound in your session occupies a chunk of it. If two sounds are fighting for the same chunk, you’ll have to fight to make them coexist. Pick sounds that already sit in different parts of the spectrum and they’ll mostly mix themselves.
This isn’t a new idea. Orchestras solved this problem long before EQ existed. A symphony arranges instruments across the register so they don’t collide – cellos, violas, violins, woodwinds, brass. The arrangement is the mix.
A track I mixed and mastered for What So Not – “Wash Over” with Daktyl and Riz La Vie – is a clean example. Look at the spectrum: sub down low, mid-bass and harmonics filling the body, melody and lead in the upper-mid range, percussion sitting up in the highs. Every element has its own register. The production was already doing the work the mix would otherwise have had to fight for.
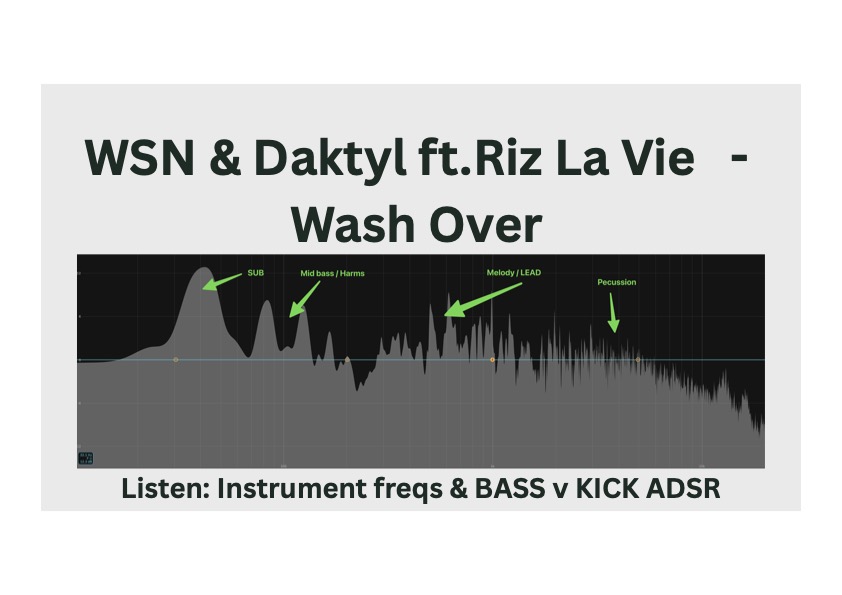
That’s the goal. Choose ingredients that already know how to share a plate.
Sound Exists in Time, Not Just Frequency
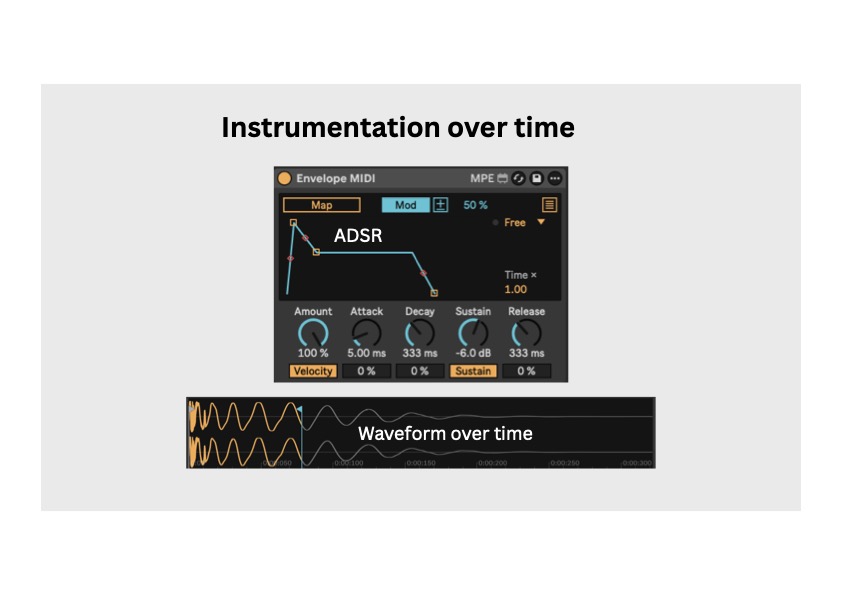
Frequency is only half the picture. The other half is time – and we have a useful framework for that: ADSR. Attack, decay, sustain, release. The shape of a sound over time determines how it interacts with everything around it.
A common low-end problem: pairing a huge tonal Reese bass with a huge tonal 808 kick. Two giant tonal low-end elements fighting for the same space? You’re going to have a bad time.
The fix isn’t an EQ move – it’s an envelope move. Pitch the kick up. Keep it short and tight. Now it punches above the sustained body of the bass. The two sounds occupy different time windows. They take turns.
That said – rule number one. It depends. On “Fallin In” with Buunshin and What So Not, the kick and bass overlap heavily in the low end, and that overlap is the point. The track wants that weight. If breaking the rule serves the song, break the rule. You’re not following a rulebook. You’re following the track.
Mixing Starts at the Oscillator
Here’s something most producers don’t think about: every waveform you load up in a synth is implying a chord.
A sine wave has only the fundamental – no harmonics, no implied harmony. A square wave’s harmonic series produces strong odd harmonics that outline a major-chord-shaped structure. A saw wave has even denser harmonic content, with similar implications.
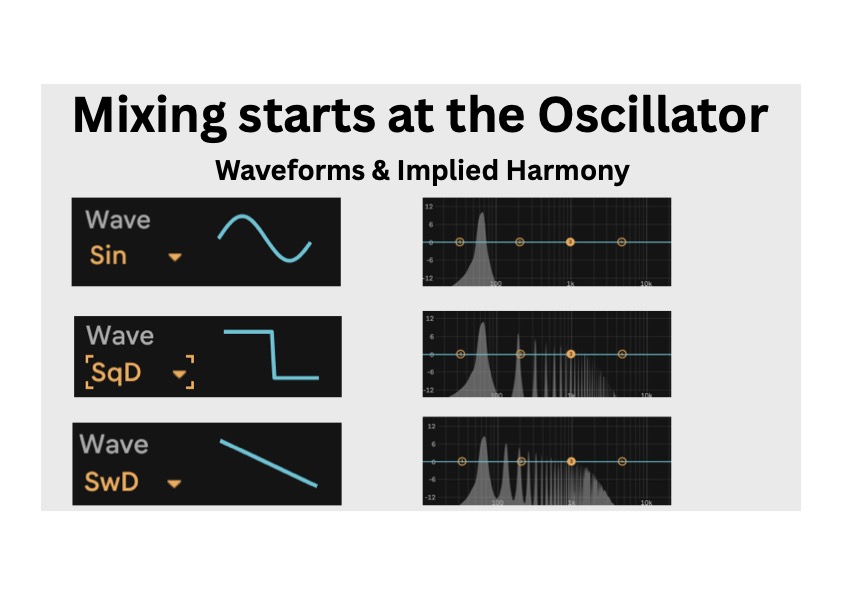
Why does this matter? If you’re making bass music in a minor key, do you want your sub implying a major chord every time it plays? Probably not. The clash is subtle but it’s there – your harmonic content is fighting the key of the track.
The way I get around this is to design subs from a sine wave – which has no implied harmony at all – and then introduce harmonics intentionally with saturation. My favourite tool for this is the Black Box Analog Design HG-2.
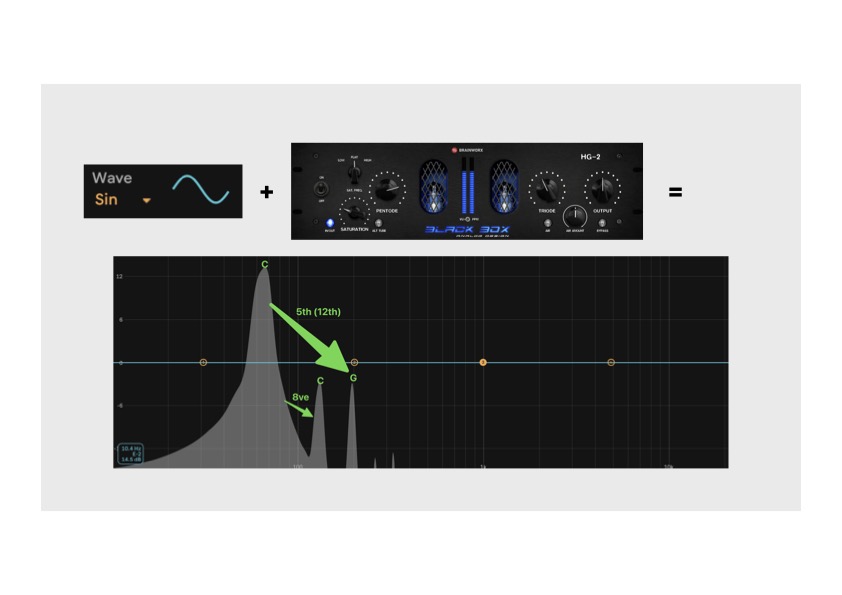
The first harmonic you get is the octave. Beautiful – completely safe, no chord quality added. The next is the fifth. A power chord. Works in both major and minor keys. By the time you’d be adding the third harmonic up, you’d be implying a major or minor third – so you stop before you get there if your key requires it. Targeted, controlled, key-aware sub design.
This matters less higher up the spectrum, where supersaws and dense waveforms behave more like timbral smearing than chord implication. Different issue. But for sub work, this is foundational.
Season As You Go: Compression, Limiting, Clipping
The next stage of the production journey is processing for loudness. Three tools, three different jobs – and they’re often misunderstood as interchangeable.
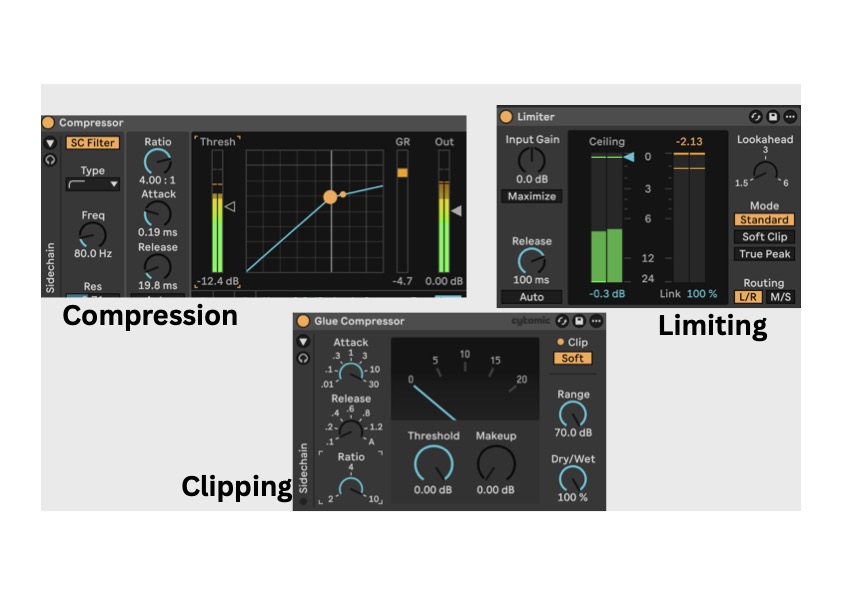
Compression is gentle dynamic control. Use it on individual tonal elements – a vocal that fluctuates, a bass with inconsistent body. The job is to even things out without flattening the life out of the sound.
Limiting is stricter. Use it on groups, buses or the master – anywhere you need a hard ceiling rather than gentle smoothing.
Clipping is something genuinely different. Not dynamic control – transient sculpting. The peaks of a sound (the very first millisecond of a kick, for example) are often louder than they need to be. Clipping shaves them off so you can raise the body of the sound underneath. Without clipping, you can’t get anywhere near commercial loudness in dance music without crushing the body of the track.
One more thing in this section: do your tonal shaping early. One thing that genuinely horrifies me is how bright finished commercial music ends up compared to where production sessions tend to live – especially in modern dance music, especially in drum & bass. If you wait until the end and slap a 10 dB high shelf on the master to “match the reference,” it’s going to sound terrible. Shape tone as you produce. Hear sounds closer to their final balance from the start.
Cook in a Hot Pan: Mix Hot, Master Hot
The last stage is loudness – and this is where most producers either chicken out or overcommit.
The cooking metaphor I keep coming back to: you don’t put your food in a cold pan and turn the heat on after. You preheat the pan first. You want the Maillard reaction. The same applies to your master chain.

The key distinction is peak vs RMS. Peak is the highest single sample your audio hits at any moment. RMS is the average energy – the body of the sound. When people talk about chest-smacking loudness, they’re talking about RMS. Peak can be jumping all over the place and the track still won’t feel loud. Raise the RMS and the track moves air.
Clipping is the bridge between the two: by shaving peaks that don’t matter, you free up headroom to raise the RMS.
Now, LUFS. I called LUFS cowardly. That’s partly a joke. LUFS are actually very useful – they measure perceived loudness, which is genuinely valuable for film, broadcast and reference comparison. But too much LUFS discourse has crept into dance music, mostly framed around “Spotify will normalise your track so don’t bother going loud.”
That’s a misunderstanding. Spotify turns your track down if it’s louder than the platform target. It doesn’t crush it. It doesn’t damage it. It just attenuates the gain. If your track hits hard, it’ll still hit hard at reduced volume. Focus on making the track sound right at full energy, not on hitting an arbitrary streaming target.
A starting point for loud dance music: aim for around -3 RMS. I’ll push toward -2 in some cases, but selectively. There has to be a reason. Rule number one applies. It depends.
The most important habit to build: mix into your master chain. Set up your master processing – tone shaping, glue, limiter – before you start mixing, then mix through it. You’ll hear the relationship between your decisions and the final loudness as you work. The alternative is building a perfect mix and then slamming 8 dB of limiting on at the end. Disaster.
The Production Journey
Three principles, one track:
- Pick your ingredients wisely. Most mixing problems are design problems.
- Season as you go. Compress, limit, clip and EQ throughout production – not just at the end.
- Cook in a hot pan. Mix into your master chain so you hear loudness in context.
If you want to watch the full talk – including a couple of demos that don’t translate to text – the video is at the top of this post.
If you want to go deeper on the mixing side specifically, our Mixing & Mastering module covers exactly this material in depth, with hands-on sessions and real project feedback.
If in-depth sessions with industry professionals is your kind of thing – check out our Method Lab advanced production module.
And keep an eye on the Liveschool events page – the next INPUT mini-conference and other producer-focused events at the school will be listed there as they come up.

Alex Braithwaite
Alex Braithwaite (SUB-human) is a mix and mastering engineer known for work with artists including What So Not, Vera Blue, RL Grime and DMA’s. He is also a Liveschool Mentor, and creates his own bass-focused productions and Ableton mastering tools.